

好きなことを発信する為だったり、自営業で仕事の募集をする為の問い合わせフォームを設置したいなど、いろいろな理由でブログを始める人はたくさんいます。
しかし、PC操作が苦手な人からするとサーバの契約やドメインの取得など、ブログをはじめるのに必要な手順が難しすぎて諦めてしまう人も多いんですよね。
そこで今回は”ConoHa WING”というレンタルサーバーを使用した、WordPressブログの開設方法について詳しく説明していきたいと思います。
ConoHa WINGでは、”かんたんセットアップ”という初心者の方でも簡単にブログ開設ができる機能がありますので、これからブログを始めようと思っている人はぜひ参考にしてみてください。
ブログ開設前に知っておきたいこと

WordPressを使用したブログ開設を行う前に、最低限以下5点を事前に確認しておきましょう。
なぜなら、これから解説するサーバーやドメイン契約などWordPressでブログを開設する際にイメージしやすくなるからです。
 ギャル
ギャルサーバー? ドメイン? そもそも”WordPress”すら意味不明よッ!
 こーぷ
こーぷこれから説明しますので、今分からなくても全然大丈夫ですよ
WordPressとは?
WordPressとは、誰でも簡単にブログやホームページを作成できるように設計されたソフトウェアです。
HTMLやCSSなどの専門知識や技術が無い人でもWebサイトが手軽に作成できます。
 ギャル
ギャルWordPressは、日本だけでなく世界中で利用されているツールみたいね
 こーぷ
こーぷ全世界の4分の1を超えるサイトがWordPressで作られていると言われています
サーバーとは?
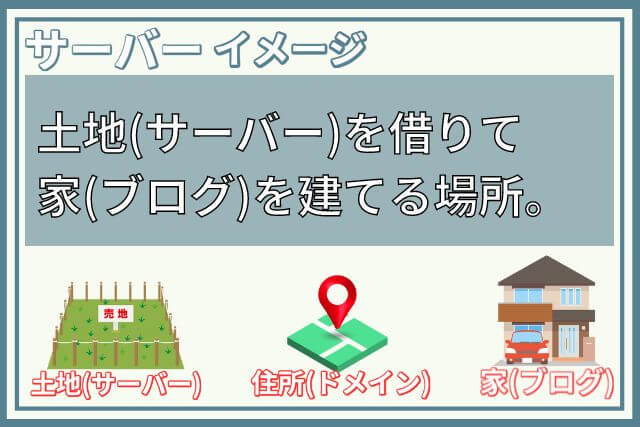
サーバーとは、データや情報などの「コンテンツを提供するコンピューター」のことを指します。
イメージとしてはレンタルサーバーを借りてブログ関連のデータを置いておく感じです。
そうすることで、ブログを見に来てくれた人はサーバー経由であなたの作ったブログを閲覧する事ができます。
ブログは家で例えられる事がありますが、サーバーは”土地”部分になりますね。
 ギャル
ギャル土地(サーバー)が無いと家(ブログ)は建てらないもんねッ!
 こーぷ
こーぷ個人でサーバーを購入するのは現実的では無いので、基本的にはレンタルサーバーを使用しますね
ドメインとは?
ドメインは以下URLの”✖”部分を指します。
https://✖✖✖✖.com
※当サイトのURLは「https://voiceactornote.com/」になりますので、ドメインは「voiceactornote」となります。
 こーぷ
こーぷ最後の「.com」部分をトップレベルドメインと呼びます。
「.com」以外にも「.co.jp」「.net」などさまざまな種類がありますよ
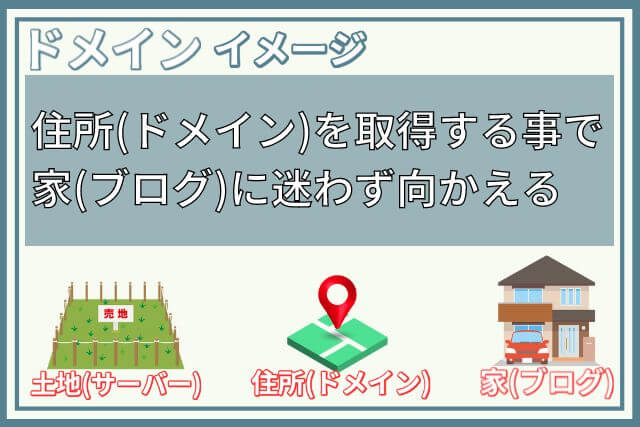
ドメインはブログの位置を示すものであり、イメージとしては、インターネット上の”住所”です。
住所(ドメイン)があることによって、迷わず家(ブログ)に向かうことができます。
 ギャル
ギャル住所(ドメイン)が無いと、そもそもどこ行けば良いか分からないもんねッ!
WordPressのテーマとは?
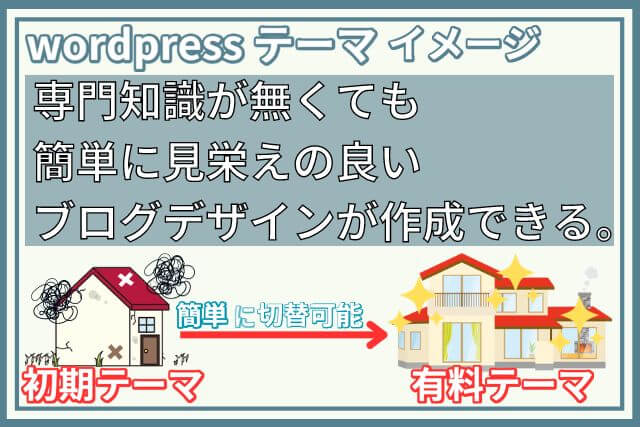
WordPressテーマとは、専門知識が無い人でも簡単にサイト全体のデザインを変更・調整できるテンプレートです。
通常はサイトデザインを変更・調整するにはHTML/CSSというプログラミング言語の知識が必要ですが”テーマ”を使用することで専門知識が無くても簡単に見栄えの良いデザインが作成できます。
 ギャル
ギャルやっぱり、サイトの見た目って大事よねッ!
こーぷ無料テーマでも有料テーマ並みに凄いものもありますよ
ブログに掛かる費用はどれくらい?
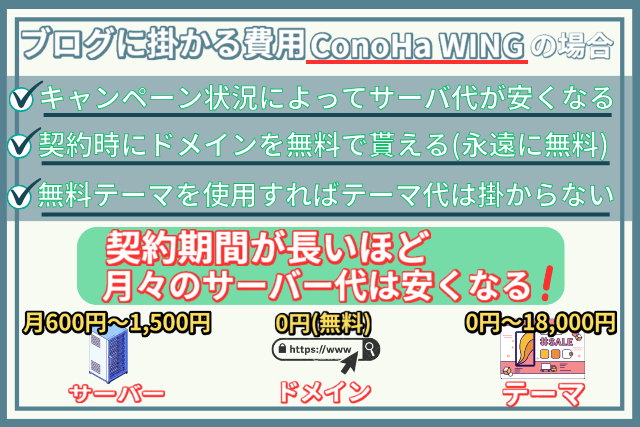
基本的にブログに掛かる大体の費用は以下になります。
- レンタルサーバー:約12,000円~15,000円/年
- 独自ドメイン:約1,500円~2,000円/年
- WordPressテーマ:0円~18,000円/有料版は買い切り
今回、紹介するConoHa WINGであればレンタルサーバー代はキャンペーン状況にもよりますが、12か月契約にすると月に1,000円も掛かりませんのでオススメです。
また、独自ドメインに関しては契約時に無料で貰えて、尚且つ年会費も永遠に無料です。
 ギャル
ギャル月に1,000円も掛からないなら、ブログをやってみるわッ!
こーぷ有料テーマも最初に購入すれば、あとは金額が発生しないのでブログは初期投資があまり掛からないですね
他にもブログをやる上で知っておいた方が良い知識はたくさんありますが、ひとまずは今回紹介した点を覚えておけばブログ開設には困りません。
 ギャル
ギャルもう既に頭がパンパンだわ・・・
こーぷあとはブログ開設するだけですよ
WordPressブログの始め方

ここでは、実際にWordPressブログの始め方について解説していきます。
説明に入る前に、WordPressのブログ開設がどのような手順で行われるかイメージしやすい様に、以下画像で簡単にまとめましたので参考にしてください。↓

画像を見て難しいと感じた人もいるかもしれませんが、1つ1つ詳しく説明しますので安心してください。
 こーぷ
こーぷPC苦手な人でも20分あれば開設できますよ!
 ギャル
ギャル本当かしら・・・?(疑いの目)
サーバーの申し込み

今回は”ConoHa WING”というレンタルサーバーを使用した、ワールドプレスブログの開設方法について紹介していきます。
ConoHa WINGとは
ConoHa WINGとはGMOインターネット株式会社が提供するレンタルサーバーです。他のレンタルサーバーと比べると比較的新しいですが、運営元は大手のグループ会社なので安心して使用できます。
ConoHa WINGをオススメする理由は以下の通りです。↓
- 国内最速スピード
- 値段が安い
- 初心者でも簡単にブログ開設が可能
- 感覚で操作できる程使いやすい管理画面
- サポートが充実している
 ギャル
ギャル初心者にメチャクチャおすすめのレンタルサーバーってことねッ!
こーぷこれからブログを始めるならConoHa WING一択と言ってもいいかもしれません
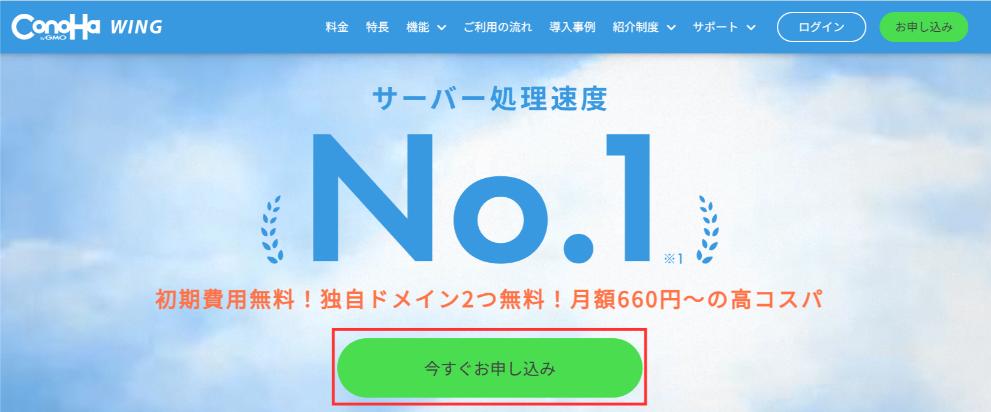
まずは、以下ボタンよりConoHa WINGのサイトにアクセス。↓
以下画面にて「今すぐお申し込み」をクリック。↓
以下画面が表示されたら、「各項目」を入力し「次へ」をクリック。↓
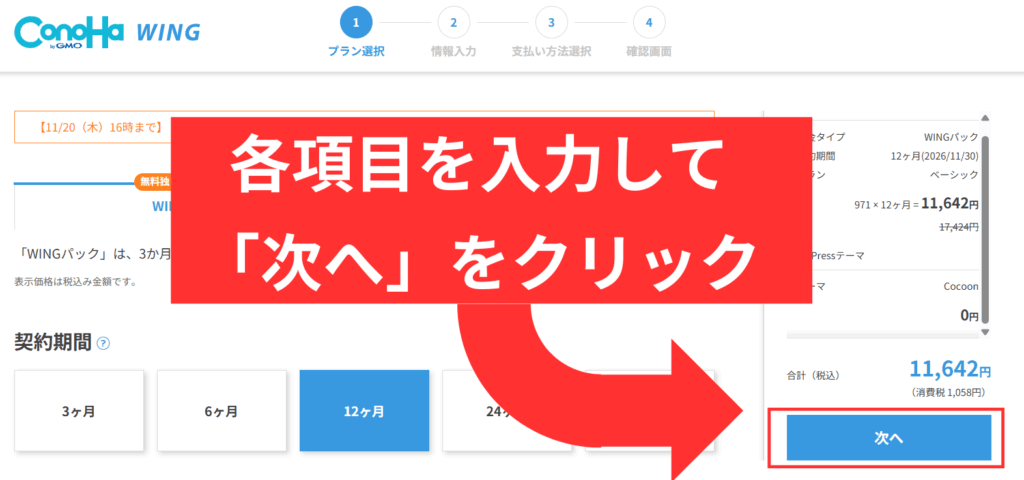
①料金タイプ

料金タイプでは「WINGパック」を選択してください。
※基本的にはデフォルトで選択されています。
WINGパックを選ぶことで以下のメリットがあります。
- 通常料金より最大53%オフで使用可能(契約期間が長いほどよりお得)
- 独自ドメインが無料で貰える(永久無料)
- 人気WordPressテーマを割引価格で購入可能
ギャルブログ運営が目的なら「WINGパック」一択ねッ!
②契約期間

契約期間を選択してください。
契約期間が長ければ長いほど月々の料金が安く、お得に契約できます。
オススメは「12か月」ですね。
なぜなら月々のサーバー代が1000円以下になるからです。
こーぷ絶対に挫折しないと思う人は「36か月」でもいいかもしれませんね
③プラン
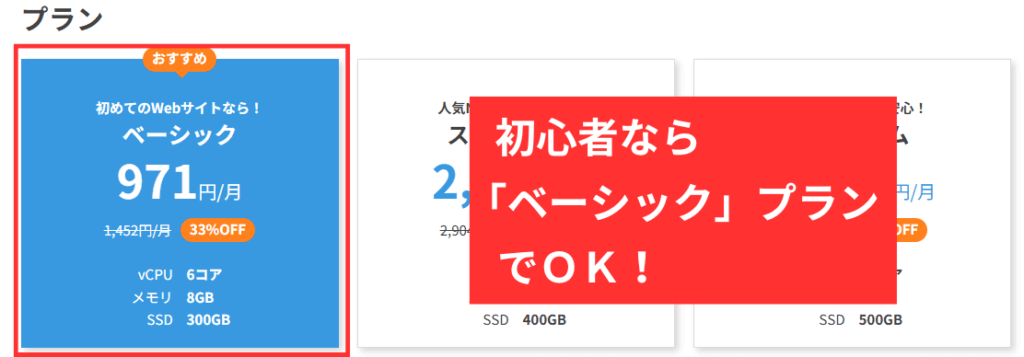
初心者の方であれば「ベーシック」プランで問題ありません。
※プランはあとからでも変更可能。
ギャル私は、初心者だしベーシックプランでまずはやってみよーっと!
④WordPressテーマ
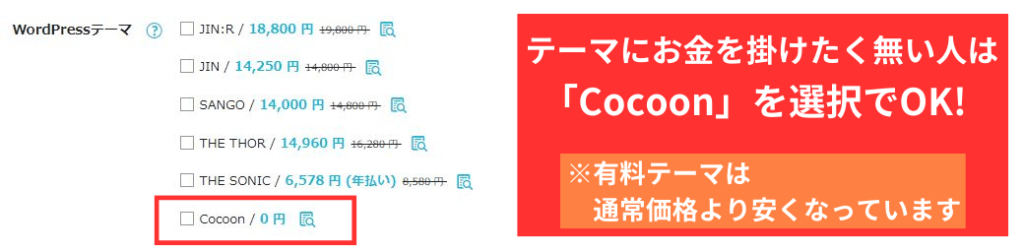
WordPressに導入するテーマを選択してください。
テーマにお金を掛けたく無い人や、特に決まっていない人は「Cocoon」を選択でOKです。
こーぷCocoonは無料なのに有料テーマ並みの高機能・高性能を持っている凄いテーマです
⑤AIブログ生成ツール
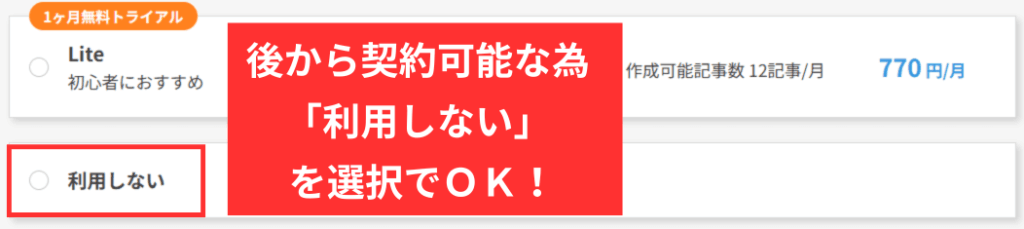
AIブログ生成ツールは「利用しない」を選択してください。
ギャルAIツールの利用を考えている人は検討してみてもいいかもね
お客様情報の入力

お客様情報の入力画面が表示されたら「各項目」を入力後に「次へ」をクリック。↓

アカウント情報

メールアドレスとパスワードを入力します。
ここで設定するメールアドレス・パスワードは、後でConoHa WINGにログインするときに利用するので、メモしておきましょう。
ギャル絶対忘れるからメモしないと・・・汗
お客様情報

以下項目を埋めていきます。
- 種別:「個人」か「法人」を選択
- 氏名:自身の名前を入力
- 性別:性別を選択(入力しなくてもOK!)
- 生年月日:自身の誕生日を選択
- 住所:住んでいる場所を入力
- 電話番号:電話番号を入力
ギャルここら辺はサクサクと入力しちゃうわよーッ!
こーぷ特に迷う入力欄は無いですね
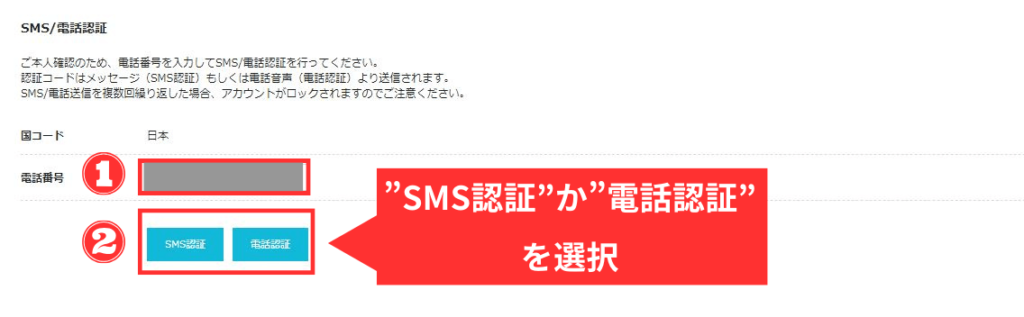
SMS認証

以下のSMS/電話認証画面が表示されたら①「電話番号」が正しいか確認して、②「”SMS認証”or”電話認証”」をクリック。↓
以下の認証コード確認画面が表示されたら①「届いた認証コード」を入力し、②「送信」をクリック。↓
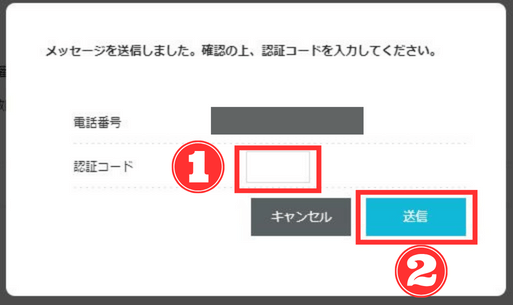
以上でSMS認証の確認は完了です。
ギャルSMS認証を選択するとスマホ宛に認証コードが送られてくるわよ
こーぷSMS認証が上手くいかない場合は電話認証を試してみてください
料金の支払い

以下、支払い画面にて①「クレジットカード」を選択後、②「クレジットカード情報」を入力、③「クーポン」記載不要で、「次へ」をクリック。↓

①「お申込み内容を確認」して問題が無ければ②「お申込み」をクリック。↓
 こーぷ
こーぷこれで申し込みは完了です
ギャルめちゃくちゃ簡単じゃない!
かんたんセットアップ

かんたんセットアップとは?
Webサイト作成に必要なものを一式まとめて、自動で組み立ててくれるサービス。
専門知識がなくても、申し込み画面の指示に従って情報を入力するだけで、すぐにWordPressブログを開始できます。
以下、かんたんセットアップ画面が表示されたら、「各項目」を入力し「確認画面へ」をクリック。↓

①セットアップ方法

初めてWordPressサイトを開設する場合は「新規インストール」を選択してください。
※他社からのサーバー乗り換えの場合は、「他社サーバーからの移行」を選択します
ギャル私は初めてブログを作成するから「新規インストール」ってわけねッ!
②独自ドメイン設定

ブログの独自ドメインを決めてください。
①:好きな文字を入力
※ドメインはサイト名や発信内容と似たようなものにするのがオススメ
②:プルダウンより、「トップレベルドメイン(「.com」「.net」「.jp」等)」を選択。
※「.com」が最もメジャーで、次に「.net」「.jp」が良く使用されています。
ドメイン名は後から変更できないの注意してください。また、ドメインは世界に1つだけのモノになりますので、既に他の人が使用していた場合は使えません。
 こーぷ
こーぷドメインは早い者勝ちですッ!
補足:ConoHa WINGの「WINGパック」契約中は独自ドメインを最大2つまで無料で取得可能です。

③作成サイト名

サイト名を入力してください。
サイト名はあとで変更可能です。
 ギャル
ギャルサイト名も可愛いモノを付けたいな~
④WordPressユーザー名

WordPressにログインする際に使用するユーザー名を入力してください。
忘れてしまうとWordPressにログインできなくなるので、メモやスクショを取っておいてください。
こーぷ忘れない様に気を付けましょう
⑤WordPressパスワード

WordPressにログインする際に使用するパスワードを入力してください。
忘れてしまうとWordPressにログインできなくなるので、メモやスクショを取っておいてください。
ギャル絶対忘れるからメモしないと・・・汗
最後に、①「確認画面」の内容をチェックして、問題無ければ②「設定」をクリック。↓
 ギャル
ギャル本当にかんたんにセットアップが出来るわねッ!
 こーぷ
こーぷ作業完了まで後少しです!
SSLの設定

WordPressの開設が完了したら、次にSSLの設定を行いましょう。
SSLとは、インターネット上でデータを暗号化して送受信する仕組みのひとつです。SSL設定を行うことでサイト訪問者の情報漏洩を守ることができます。
※SSL設定が完了するとURLの「http」が「https」になります。
こーぷConoHa WINGの場合は自動でSSL設定を行ってくれます
ギャル本当に自動でやってくれるの・・・?(疑いの目)
SSLの設定が完了しているか不安な場合は手動でSSL設定を行うこともできます。
まずは”ConoHa WING 管理画面”にアクセスしてください。
その後、①「サイト管理」クリックして②「サイト設定」をクリック後に”かんたんSSL化”の③「有効化」をクリック。↓
※「有効化」ボタンがグレーアウトしている場合はしばらく待ってからお試しください。
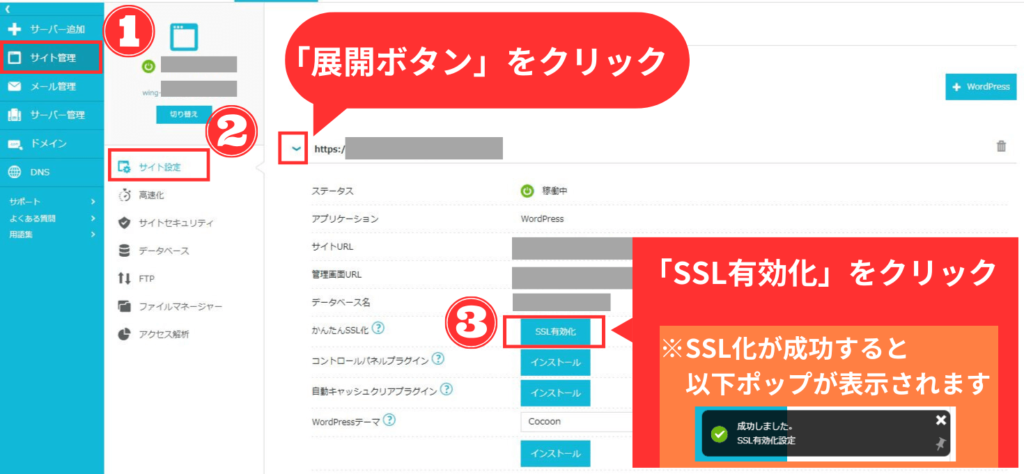
SSL化の設定が成功すると画面左下に「成功しました」とポップが上がってきます。↓
 ギャル
ギャルこれでセキュリティ面が強化されたって事ねッ!
ブログにログイン

WordPressで自分のブログにログインしたい場合は、自分のサイトアドレスの最後に「/wp-admin」をつけてアクセスしてください。
https://✖✖✖✖.com/wp-admin
以下の様なログイン画面が表示されたら、かんたんセットアップのときに決めた①「ユーザー名」と②「パスワード」を入力して③「ログイン」をクリック。↓

以下ブログの管理画面が表示されたら、ログイン完了です。↓
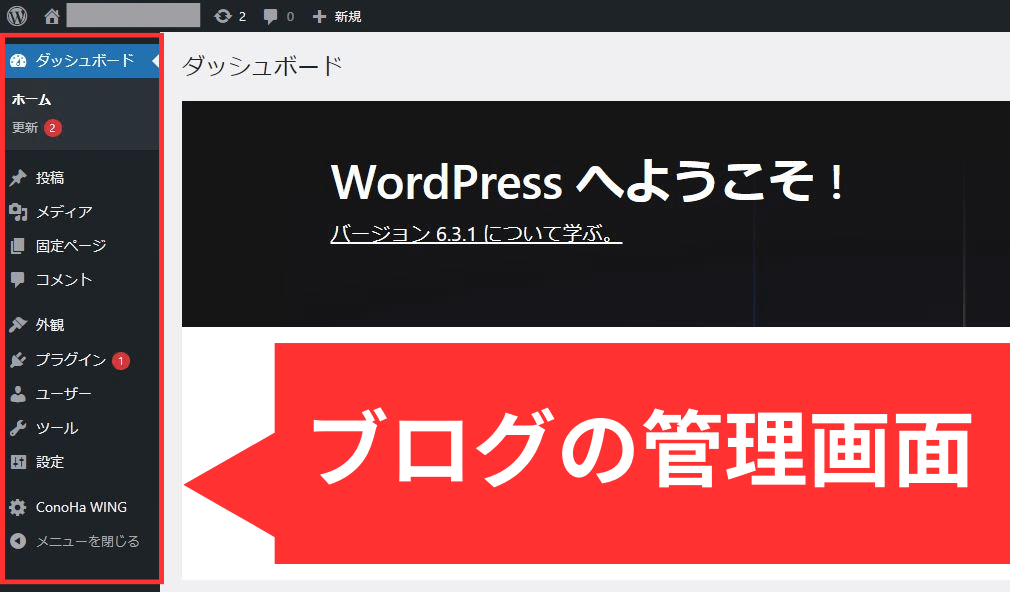
以上で、WordPressブログの開設手順はすべて完了です。
ギャルこれでついに私だけのサイトが完成したってわけね・・・(感激)
こーぷおめでとうございます!
最初にやるべきWordPressの初期設定
WordPressでブログの開設が完了したらはじめの内にいくつか初期設定を済ませておきましょう。
なぜなら、後になって設定すると設定内容によっては取り返しのつかないの付かない可能性があるからです。
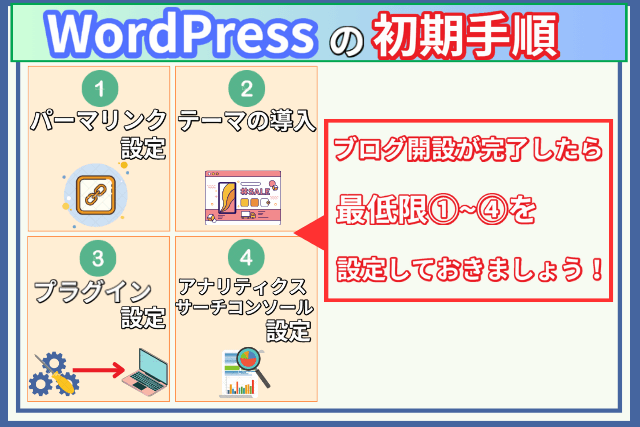
そのためブログ開設後は、以下の設定を実施してください。↓
 ギャル
ギャルま、まだやることあるの・・・?
こーぷあと少しなので頑張りましょう!
パーマリンクの設定
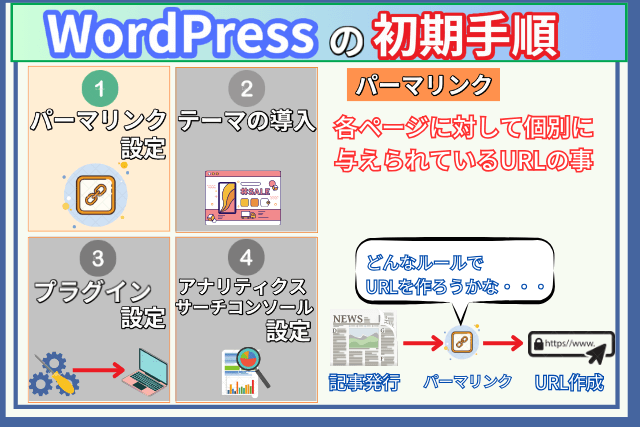
パーマリンクとは、各ページに対して個別に与えられているURLの事です。
これから設定するのは、記事作成時に割り振られる個別URLの発行ルールを設定していきます。
ブログ運営の途中でルールを変えてしまうと、これまで割り振られた過去記事のURLもすべて変更されてしまい、さまざまなデメリットが発生するため最初の内に設定しておきましょう。
ギャルこれは直ぐにでも設定しておいた方がよさそうね・・・
設定方法は簡単です。
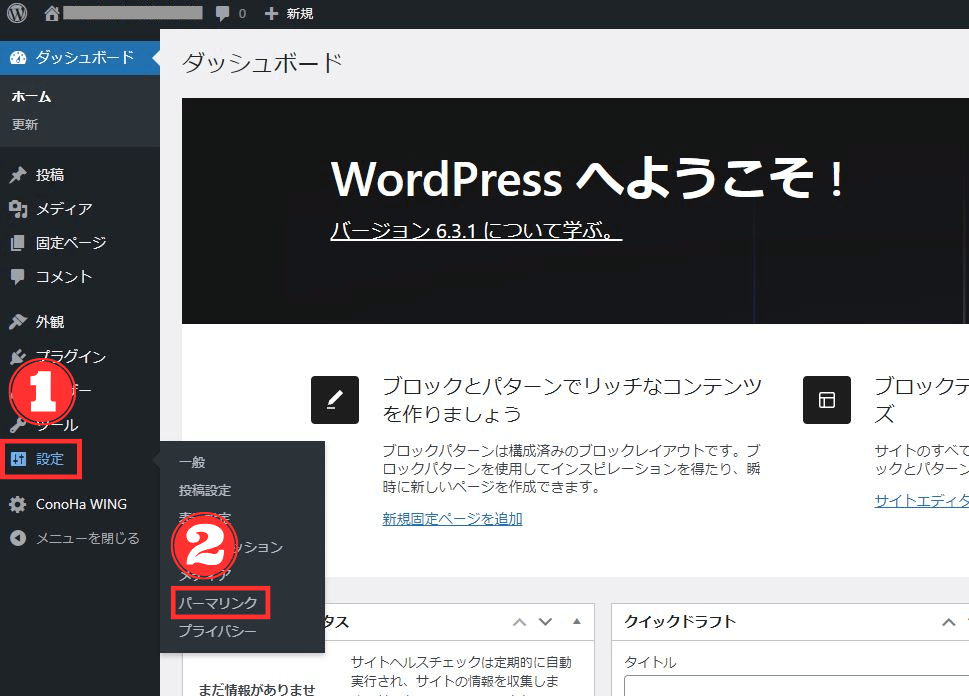
まずブログにログイン後、管理画面の①「設定」をクリックし②「パーマリンク」をクリック。↓
パーマリンクの設定画面にて①「投稿名」にチェックを入れて、②「変更を保存」をクリック。↓
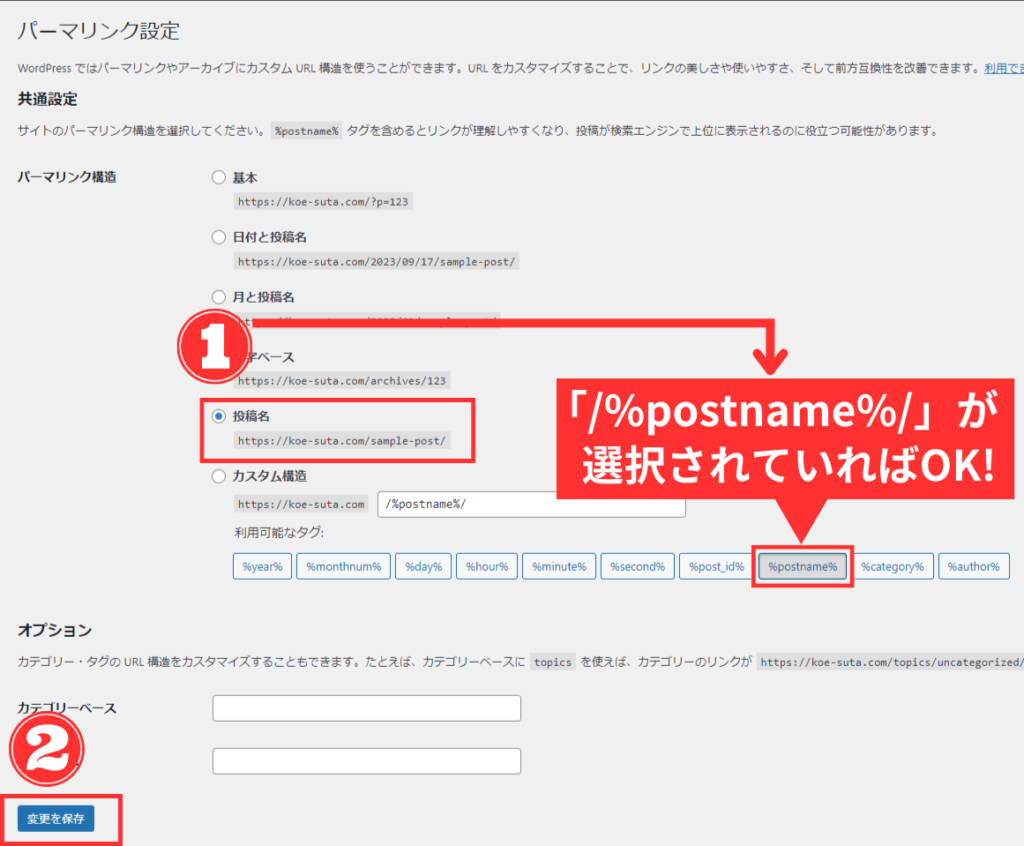
以上で、パーマリンクの設定は完了です。
ギャルなによ、メチャクチャ簡単じゃないッ!
こーぷ忘れずに最初に設定しておきましょう!
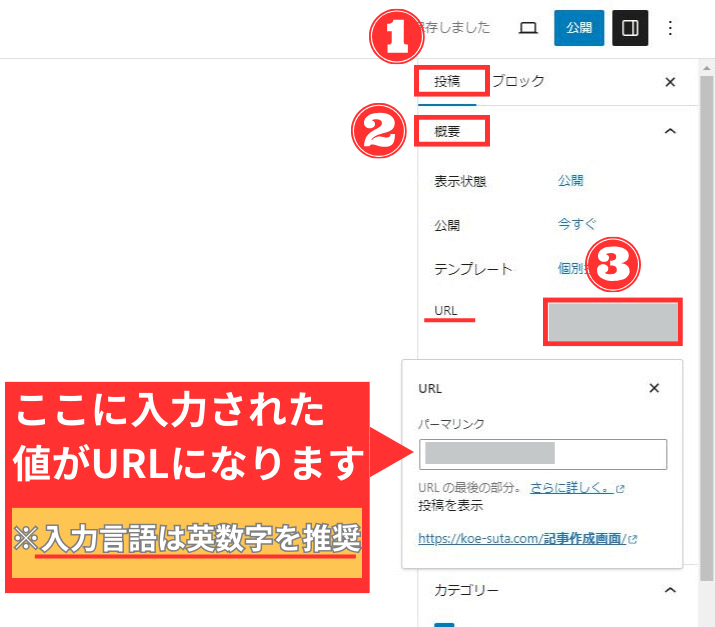
パーマリンク設定以降に記事を作成した場合、記事作成画面の右側の①「投稿」を選択し②「概要」から③「URL」をクリックして”パーマリンク”欄に自身の好きな英数字を入力してURLを変更することができます。↓
テーマの導入
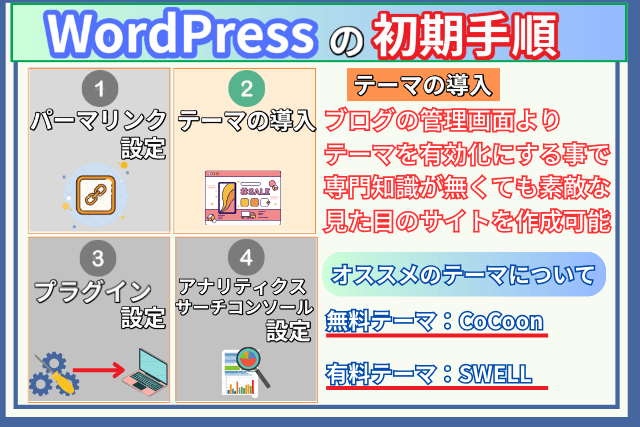
現在は初期テーマが設定されていますが、サイトの見た目があまりよろしくないので他のテーマに変更しましょう。
テーマはいろいろありますがオススメのテーマは以下となります。
- 無料テーマ:Cocoon
- 有料テーマ:SWELL(おすすめ)
有料にはなってしまいますが、初心者の人にはswellがオススメです。
なぜなら、Cocoonは無料テーマでありながら有料テーマ並みの機能を持っていますが、その分カスタマイズ等が難しいので、PC操作が苦手な人からすると大変なんですよね。
一方、swellは感覚で操作できるくらい簡単なので初心者の人にはピッタリのテーマです。
初期費用が掛かってしまいますが可能なら最初の段階でswellを導入するのがベストです。
swellの導入方法については、以下記事で紹介していますので参考にしてみてください。

 こーぷ
こーぷ後からでも切替は可能ですが、Cocoonからswellに移行する作業が結構、大変でしたね・・・汗
ギャルSWELLは操作性が簡単で、PC操作が苦手な人にオススメのテーマよッ!
テーマの変更方法
初期テーマからCocoonテーマに変更する方法は簡単です。
まずは、ブログにログイン後、管理画面の①「外観」をクリックし②「テーマ」をクリック。↓
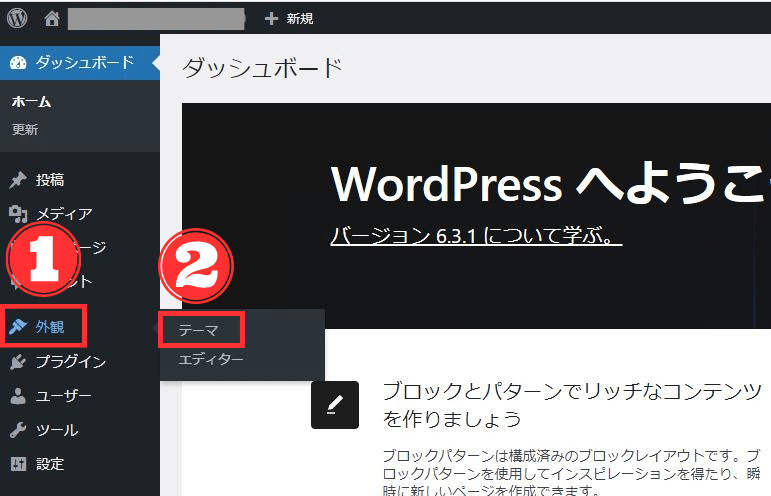
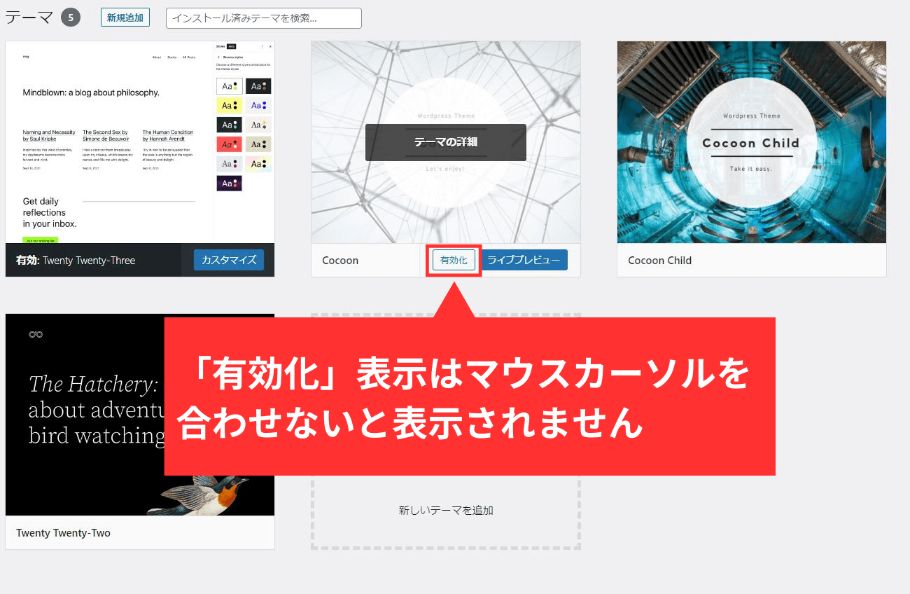
テーマ画面にて、変更したいテーマにマウスカーソルを合わせた後「有効化」をクリック。↓
※今回は例としてCocoonを使用。
以上で、テーマの変更は完了です。
ギャルこっちも簡単だったわねッ!
デザインの変更方法
また今回、例として挙げたCocoonはいろいろな種類のデザインがあり、簡単に切り替えることができます。
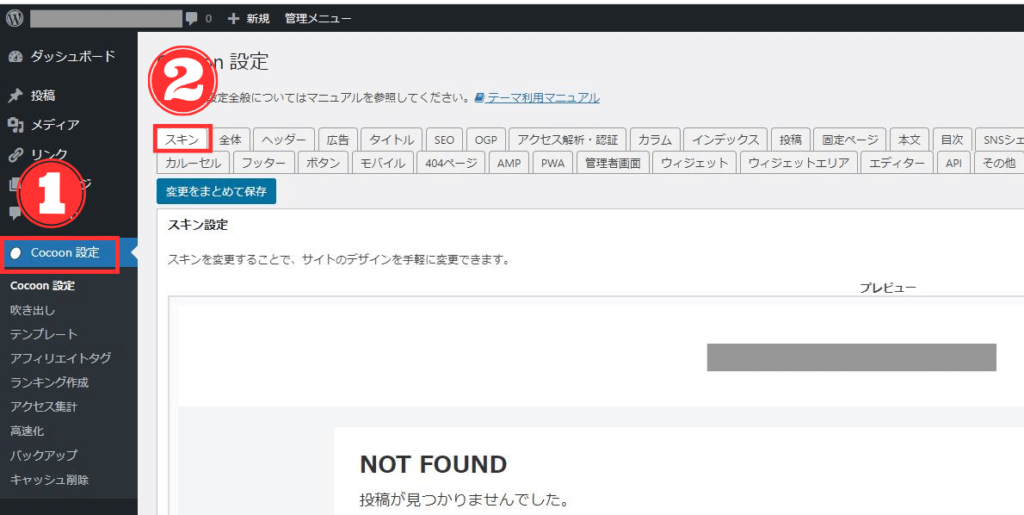
やり方はCocoonを有効化にした状態で、管理画面の①「Cocoon設定」をクリック後、②「スキン」を選択。↓
スキンを選択した状態で、下に画面をスクロールすると”スキン一覧”が表示されるので後は自分の好みの①「スキン」を選択し、②「変更をまとめて保存」をクリック。↓
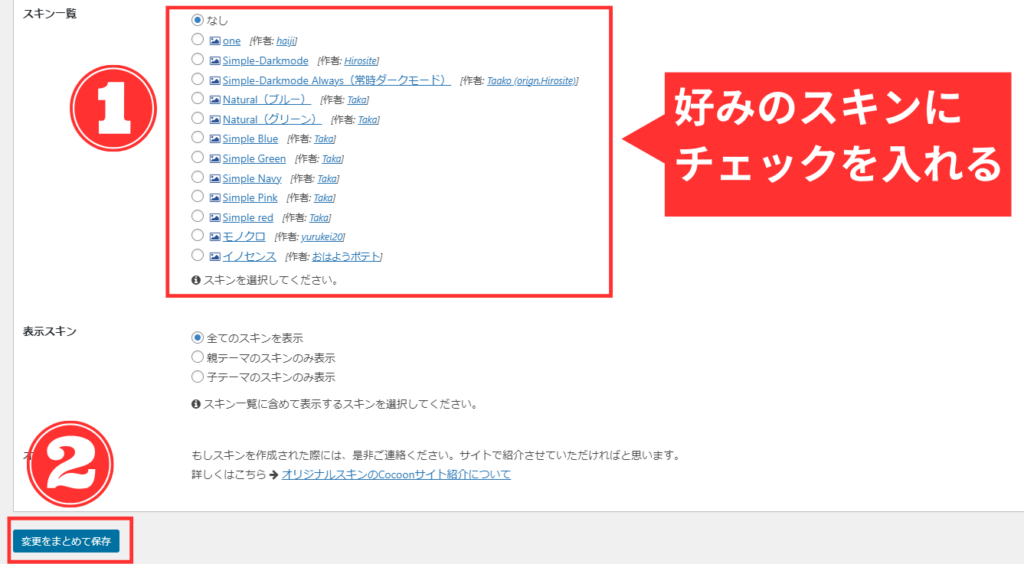
以上でスキンの変更は完了です。
初期テーマとCocoon導入後では、サイトの見た目が以下の様に大分違ってきます。↓
初期テーマ
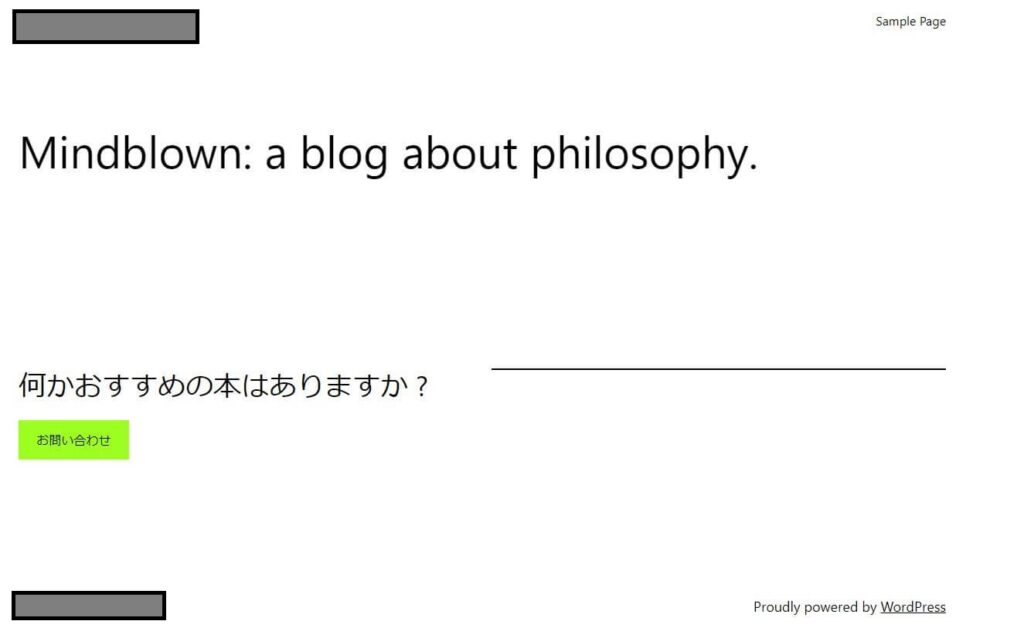
Cocoonテーマ
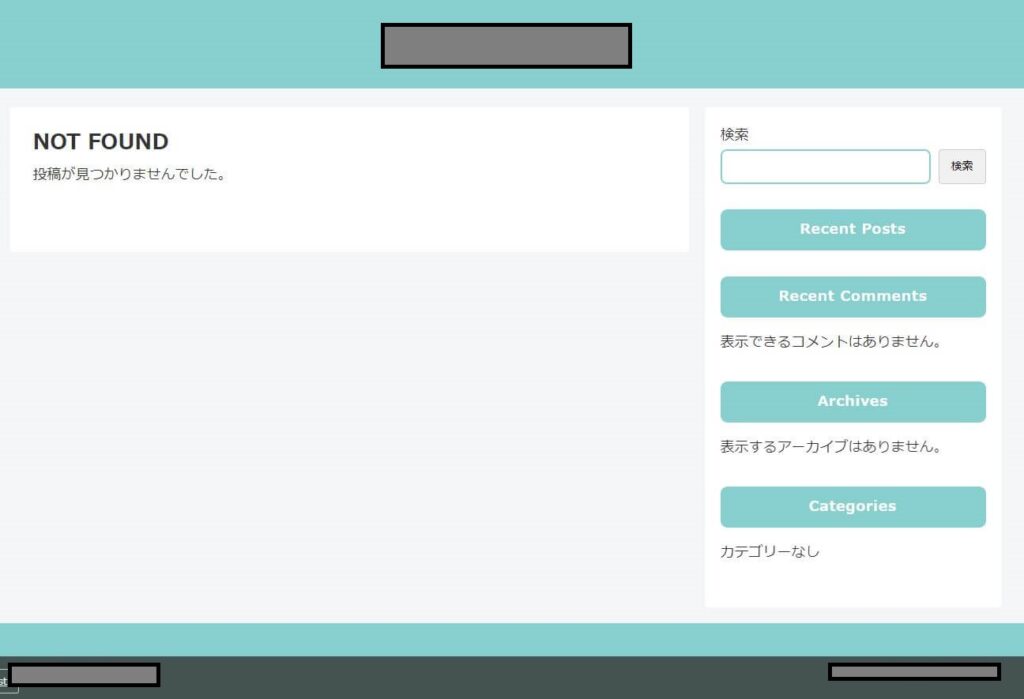 ギャル
ギャルテーマを導入しただけで、ここまで見た目が変わるのッ!?
こーぷ実際には、もっと細かくいろいろな調整ができますよ
プラグインの設定
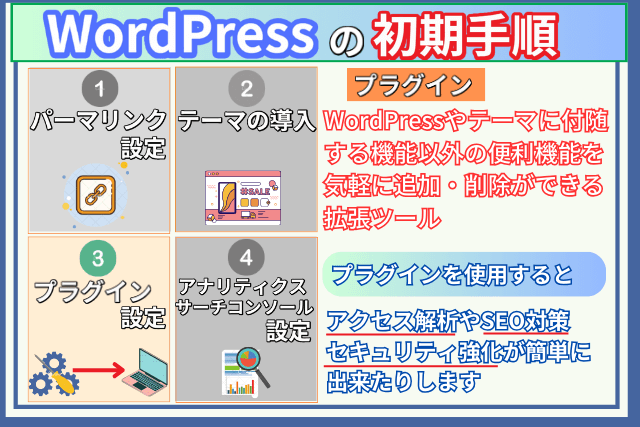
プラグインとは、WordPressの機能やテーマに付随している機能以外の便利な機能を気軽に追加・削除ができる拡張ツールです。
たとえばあなたが自営業をしていて、ブログに問い合わせ機能を追加したい場合もプラグイン機能を使用することで簡単に問い合わせフォームを設置出来るんですよね。
ギャルえ? すごい便利ねッ!
他にもブログのセキュリティを強化するプラグインや、データのバックアップを取るプラグインなどいろいろあります。
無料から有料のモノまでたくさんのプラグインがあるので、何か欲しいと思った機能があれば一度探してみるのもアリですね。
また、最低限導入しておいた方が良いプラグインについては、以下のサイト様で初心者向けにとても詳しく解説されていますので参考にしてみてください。

アナリティクス・サーチコンソールの設定
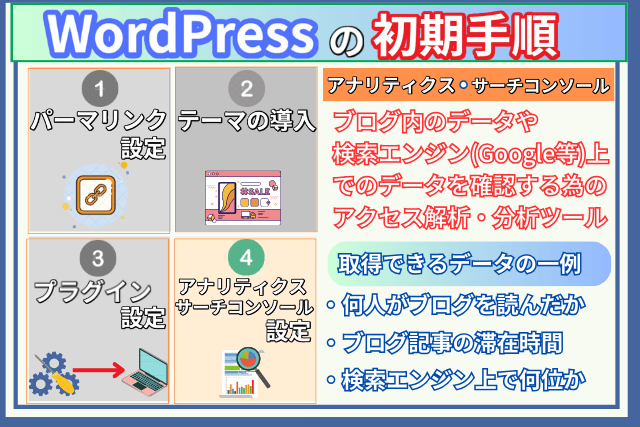
ブログ運営をするうえで”データ”はとても大切です。
たとえば
- 書いた記事に1日どれくらいの人が訪れて、何分間読んでくれたのか
- 1か月間で訪れた視聴者数やブログの滞在時間
- どうやって自分のブログ記事に辿り着いたのか
- 記事が検索エンジン(GoogleやYahoo!等)上で何位に表示されているか
など。
いろいろなデータがあればその分ブログ全体、あるいは記事単体に対しての良い点・悪い点が見えて改善できます。
そんなデータを取得するためのものが「Googleアナリティクス」と「Google サーチコンソール」です。
ギャルへ~、いろいろな情報が確認できるのね
イメージとしては”アナリティクス”はブログ内のデータが確認でき、”サーチコンソール”は検索エンジン(GoogleやYahoo!等)上でのデータを確認できます。
2つのツールを使用して集めたデータをもとにブログ全体や記事内容を改善することで、より自分のブログを読みに来てくれた視聴者の満足度が高まりますので、早いうちに導入しておきましょう。
こーぷブログを長期的に運営するなら、導入必須のツールですね
アナリティクスとサーチコンソールの導入方法については、以下のサイト様で初心者向けにとても詳しく解説されていますので参考にしてみてください。
<アナリティクス↓>

<サーチコンソール↓>

まとめ
今回は初心者向けにWordPressブログの始め方について紹介しました。
PC操作が苦手な人からすると、サーバー契約やドメイン取得、SSL設定などは難しくて挫折してしまう人も多いでしょう。
ですが今回紹介したConoHa WINGでは、”かんたんセットアップ”という機能を使用することで、それらの設定を一括で実施してくれます。
そのため、これからブログを始めようと考えている人でPC操作が苦手な人は、ConoHa WINGを使用してブログ開設するのをオススメします。

コメント